
Museum Lighting shapes what visitors notice, how long they look, and how safely collections are displayed. A bright label can clarify a date; glare across glass can hide the object beside it. Good exhibit lighting balances visibility, atmosphere, and long-term preservation. It is not simply a matter of making a room brighter.
Conservation scientist Stefan Michalski is widely associated with this practical warning: “Light damage is cumulative and irreversible.” That matters for a watercolor, a faded textile, and even a paper label. The effect may seem invisible during one visit, then become clear years later. The answer is not darkness. It is measured, deliberate illumination.
The following ten tips explore how to choose light levels, control glare, reveal texture, and protect sensitive objects. They also consider LED selection, color quality, daylight, and lighting controls. A woven fabric may need soft grazing light to show its threads, while a glossy photograph may demand a careful change in angle. Small adjustments matter. Yet no single setting suits every gallery. Staff should assess object sensitivity, visitor needs, and actual conditions, then review the results over time. A lux meter can help, but it cannot replace careful observation. Some choices will still need reconsideration. That is part of responsible Museum Lighting.
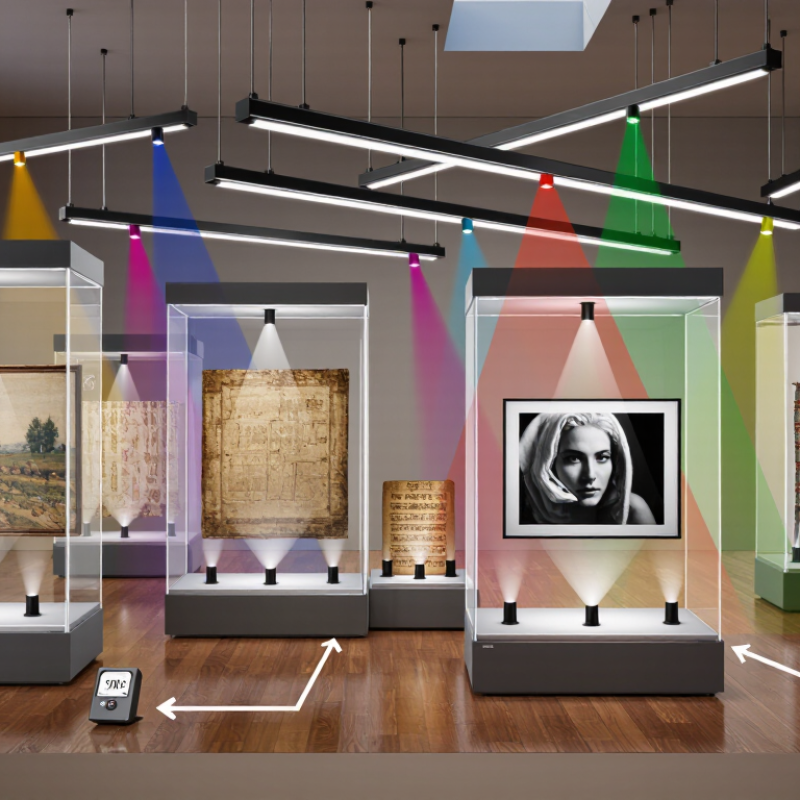
Before choosing fixtures, assess what each exhibit is made of and how it has aged. Paper, watercolors, and dyed textiles can be more light-sensitive than stone or metal. Check for fading, fragile edges, and glossy surfaces that may reflect light into visitors’ eyes. Record current conditions, and consult a conservator when an object’s sensitivity is unclear. Use a light meter to measure illumination at the object, not just across the room. Small details matter.
Then consider who needs to see the exhibit and how they will move through it. A label that looks clear to staff may be difficult to read for someone with low vision. Test it from a seated position and from the expected viewing distance. Reduce glare on glass cases, and keep pathways evenly lit so visitors can move safely between brighter displays. Not every shadow is a problem. Some can help create focus, but deep shadows may hide important details.
Set a lighting goal for each display: accurate color, close inspection, or a quieter mood. These goals may conflict, so decide which matters most for each object. Dimming, shielding, and timed controls can help limit unnecessary exposure, but settings should be checked during actual opening hours. A plan may look balanced on paper and still feel harsh in the gallery. Revisit it with visitors present, and adjust where needed.
Museum lighting should reveal an object’s character without speeding its deterioration. Start by checking the collection’s needs: pigments, paper, textiles, and photographs may respond differently to light. A high color-rendering index can help colors appear natural, but it does not guarantee a faithful view on its own. Compare samples under the proposed lamps, and check whether reds, skin tones, and subtle paint layers remain clear. Color temperature matters, too. A cooler lamp can make a warm painting feel flat; a warmer one may distort a cool textile. Test before committing.
Tips: Choose lamps with consistent color output and low ultraviolet and infrared emissions. Ask for measured specifications, not just “museum quality” claims. Keep fixtures away from fragile objects when possible, and use dimming or timed controls to limit exposure. Less can be safer.
Heat is easy to overlook. A small spotlight can warm a case or a delicate surface, especially in a compact gallery. Measure temperatures near the object after the lights have run for several hours, then adjust distance, beam angle, or intensity. LED sources often produce less radiant heat than older lamp types, but the fixture and room still matter. We have sometimes trusted a lamp’s listed color temperature too quickly; a quick gallery test can expose an uncomfortable cast. Record settings so staff can repeat them, and review them when displays change.
Common conservation-planning targets are about 50 lux for highly sensitive materials such as watercolors and textiles, 150 lux for moderately sensitive objects, and 300 lux for low-sensitivity materials such as stone and metal. These are not universal limits; follow conservators’ guidance for each collection. Choose high-CRI light sources for faithful color, and use UV filtering and careful fixture placement to limit damage and unwanted heat.
Guidance basis: commonly cited museum conservation illuminance recommendations, including Canadian Conservation Institute guidance.
Good exhibit lighting lets visitors see detail without making the room feel harsh. A bright label beside a dim textile can pull attention away from the object. Yet raising every light level is not the answer. Contrast guides the eye, while gradual transitions help visitors adapt between galleries. Glass, pale walls, and daylight near entrances can all change how brightness feels. A lighting plan should consider viewing distance and object sensitivity, not just fixture output.
Tip: Stand where visitors will stand. Check for glare on cases, washed-out labels, and reflections across framed works. Adjust one area at a time, then look again after your eyes have adapted. Small changes can matter.
Visual comfort is easy to overlook during installation. A display may look balanced from the doorway but feel tiring after several minutes beside it. Use focused light to reveal texture, while keeping nearby surfaces calm and readable. Avoid sharp pools of brightness next to deep shadow unless the contrast supports the story. Dimmer settings can help, but they are not a substitute for careful placement. Even a measured setup may feel flat; invite staff to test the space during normal gallery hours and note what visitors miss or avoid.
Light damage is cumulative, even when a gallery feels dim. The Canadian Conservation Institute’s guidance on light, ultraviolet, and infrared radiation uses 50 lux as a benchmark for highly light-sensitive objects, including works on paper and dyed textiles. Some damage is irreversible. Measure illumination at the object’s surface, not just beneath the ceiling fixture. A small spotlight can create a bright patch on a photograph while the rest of the case appears subdued. Reduce exposure time as well as brightness; rotating fragile objects can help limit their annual light dose.
The CIE report Control of Damage to Museum Objects by Optical Radiation (CIE 157:2004) emphasizes that damage depends on both radiation and exposure duration. Use UV-filtering materials where appropriate, but do not treat UV removal as complete protection: visible light can also fade pigments and fibers. Dimming controls, curtains, and timed lighting offer practical safeguards. Keep a written lux reading and record display hours, then check them when lamps or case layouts change. One detail is easy to miss: visitors need enough light to see, yet a uniformly bright case may expose every object unnecessarily. That balance deserves regular review.
| # | Lighting Tip | Practical Approach | Useful Target or Check | Why It Helps |
|---|---|---|---|---|
| 1 | Classify objects by light sensitivity | Assess materials and condition before setting exhibit lighting. Paper, textiles, watercolors, and many photographs are especially vulnerable; stone, metal, and ceramics are generally less sensitive. | Use approximately 50 lux as a common starting point for highly light-sensitive objects; set limits with a conservator. | Different materials fade and deteriorate at different rates, so one lighting level is not suitable for every object. |
| 2 | Measure light at the object | Use a calibrated lux meter at the object’s surface and at the points receiving the most light. Recheck after changing lamps, displays, or exhibit layout. | Record readings in lux; do not rely only on lamp output or room-level measurements. | Light levels at an object can vary considerably with distance, angle, display case glazing, and spotlight position. |
| 3 | Limit exposure time | Turn off or dim exhibit lights when galleries are closed, and use occupancy controls where appropriate. Track both light intensity and hours of display. | Estimate cumulative exposure in lux-hours: lux × hours of exposure. | Light damage accumulates with exposure, so reducing display time can help protect an object even when light levels are already low. |
| 4 | Keep highly sensitive works near 50 lux | Set a conservative illumination level for works on paper, textiles, and similarly vulnerable materials; balance visibility with preservation needs. | About 50 lux is a widely used guideline, not a universal limit; confirm the appropriate level for each collection. | Lower illumination reduces the rate of light-induced fading and other photochemical changes. |
| 5 | Use higher levels selectively | Consider brighter lighting only for materials that can tolerate it, and avoid allowing light from nearby displays to spill onto sensitive objects. | Some guidance uses roughly 150–200 lux for moderately sensitive objects; verify with conservation staff. | Selective lighting can improve readability and visitor experience without exposing every object to the same intensity. |
| 6 | Block ultraviolet radiation | Filter daylight and artificial light where needed, and check filters and glazing periodically for damage or aging. | Measure ultraviolet radiation with a suitable UV meter; a commonly cited guideline is below 75 µW/lm. | UV radiation can contribute to fading and material degradation. Removing UV does not eliminate damage from visible light. |
| 7 | Keep daylight under control | Use blinds, shutters, UV-filtering treatments, or carefully designed glazing to prevent direct sunlight from reaching objects. | Check displays at different times of day and across seasons, when sun angles and daylight levels change. | Sunlight can cause intense, uneven exposure and may add heat as well as damaging radiation. |
| 8 | Choose low-heat lighting and placement | Position fixtures so they do not warm objects or display cases. Check object and case temperatures during operating hours. | Look for temperature increases near the object; investigate noticeable or sustained warming. | Heat can stress materials and may affect the temperature and humidity conditions inside a case. |
| 9 | Use focused, even illumination | Aim fixtures carefully, reduce glare, and use diffusers or adjustable optics to avoid harsh hotspots and unnecessary spill light. | Compare lux readings at several points across the object or display case. | Even illumination improves viewing comfort while helping prevent small areas from receiving excessive exposure. |
| 10 | Review and document lighting regularly | Keep records of lux readings, operating hours, UV checks, display dates, and any changes to fixtures or filters. Reassess when exhibits change. | Maintain a dated log and set a regular inspection schedule appropriate to the exhibit and equipment. | Documentation helps staff identify changing conditions, manage cumulative exposure, and make consistent conservation decisions. |
Note: Lux recommendations are general planning guidelines. Appropriate limits depend on object materials, condition, exposure history, and institutional conservation policy; consult a qualified conservator for collection-specific decisions.
Exhibit lighting needs active management, not a one-time adjustment. Dimming controls can reduce exposure during quiet hours, while timed scenes keep displays consistent across the day. The Canadian Conservation Institute’s guidance uses about 50 lux or less for highly light-sensitive objects such as works on paper and textiles. Treat this as a practical illuminance benchmark, not a complete measure of safety: cumulative exposure also depends on how long the light stays on. Small changes matter.
Record light levels at the object surface, not just near the fixture. A handheld lux meter can reveal bright patches caused by a shifted spotlight or a newly polished display case. Log readings and operating hours, then compare them during scheduled checks. The CCI’s “Agent of Deterioration: Light, Ultraviolet and Infrared” explains why exposure and material sensitivity both matter. A display can look evenly lit while one corner receives much more light.
Check dimmers, timers, and sensors monthly, and inspect them again after gallery work or lamp replacement. Confirm that scenes return to their intended settings; controls can drift. Keep a simple record of readings, adjustments, and object locations. Not every fluctuation signals a problem. But unexplained changes deserve another measurement before staff raise the light level for visibility.
