
Choosing the best LED light kit is less about buying the brightest panel and more about matching light to the work. A compact desk setup may need soft, quiet output, while interviews often benefit from a controllable key light and a separate fill. Check brightness at a stated distance, color temperature, dimming range, power options, and mounting compatibility. Small details count.
The U.S. Department of Energy’s Energy Saver guidance says LEDs use up to 90% less energy and can last up to 25 times longer than incandescent bulbs. That comparison concerns general lighting, not the performance of studio kits, so it should not decide your purchase alone. For video, compare CRI or TLCI ratings, but test skin tones if possible. A high score does not guarantee pleasing color in every camera or room. Fan noise matters, too.
Cinematographer and lighting authority John Alton is often credited with the principle, “It’s not what you light, it’s what you don’t light.” It remains useful when choosing an LED light kit: control and placement can matter more than sheer output. There is no universal best kit. A lightweight panel may travel well but struggle through diffusion; a powerful fixture may overwhelm a small room. That trade-off is easy to miss. This guide will help readers compare real-world output, color quality, accessories, noise, and budget before choosing. One honest caveat: specifications narrow the options, but a hands-on test often reveals what a product page cannot.
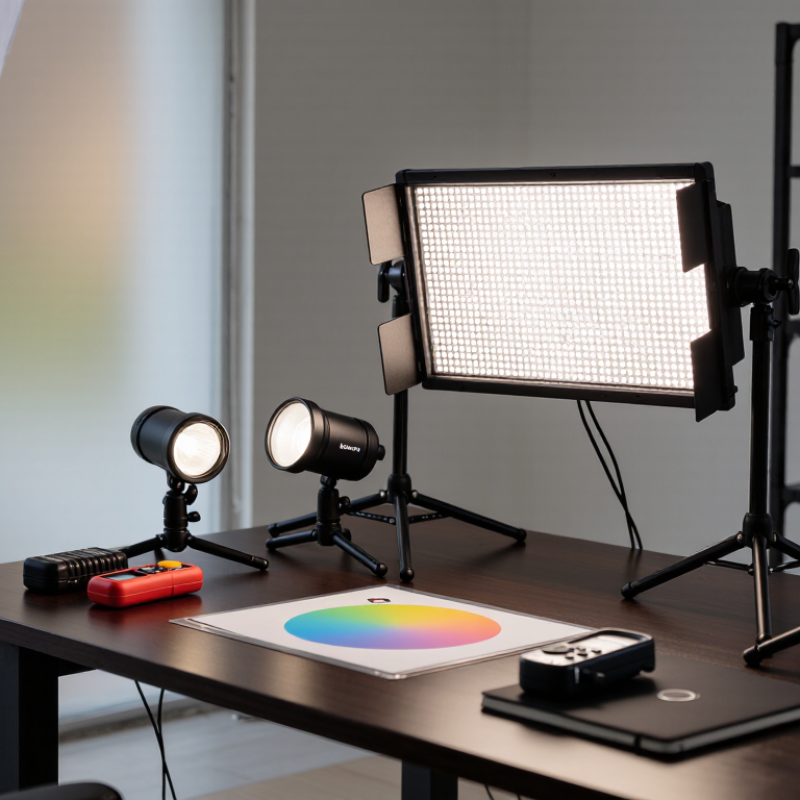
Before comparing LED light kits, define what you need to illuminate and how the result will be used. A face-to-camera interview needs soft, even light; product shots may need controllable highlights and accurate color. Note your subject’s size, shooting distance, and whether daylight or mixed indoor lighting will be present. Start there. For color-critical work, look for a high color-rendering index and consistent color when dimmed. Test the light with your camera when possible. Advertised brightness matters less if the kit cannot cover your scene evenly.
Then inspect the workspace. Measure ceiling height, floor space, and distance to an outlet. In a narrow room, large stands and modifiers can block movement, while a compact panel may be easier to position. Check whether the lights will run near a window, in a warm studio, or on location with limited power. Fan noise can spoil recorded dialogue. A light that looks impressive on paper may feel awkward beside a desk; I once underestimated the reach needed for a softbox. Leave space for stands, cables, and clear walkways, and make sure you can reach the controls from your camera position. Conditions change, so test the setup in the actual space.
How to Choose the Best LED Light Kit?
Compare Light Types, Brightness, Color Accuracy, and Color Range
A soft panel spreads light across a broad surface, making it useful for interviews and close-up work. A COB light is more directional and can cast sharper shadows unless you add diffusion. Neither type is automatically better; room size, subject distance, and setup time matter. Look beyond wattage. Check measured lux at a stated distance, since a bright-looking spec can hide weak output several feet away. Numbers can mislead.
For color accuracy, check CRI, but don’t treat it as the whole story. The Illuminating Engineering Society’s TM-30-20 method assesses 99 color samples and reports fidelity (Rf) and gamut (Rg). Those measures can reveal shifts that a single CRI score may miss. Check skin tones too. If possible, test the light beside a neutral gray card and familiar fabric under your actual camera settings.
Color range usually means both white-light adjustment and colored output. A tunable white range helps match window daylight or warm room lamps; RGB controls add creative hues, but may reduce usable brightness. The U.S. Department of Energy’s Energy Saver guidance says LEDs use at least 75% less energy and last up to 25 times longer than incandescent bulbs. That comparison concerns bulbs, not kit performance, so verify the kit’s own output and runtime. I still find advertised color range easy to overvalue; smooth adjustment and consistent color across settings matter more in daily use.
| Light type | Typical brightness at 1 m | Typical color accuracy | Typical color range | Best suited for | What to consider |
|---|---|---|---|---|---|
| Daylight COB | About 10,000–60,000 lux with a reflector; varies widely by power and reflector design. | Many video-oriented models specify CRI and TLCI of 95 or higher. | Usually fixed near 5,600 K; some models offer limited adjustment. | Bright key or fill light, daylight-balanced sets, and use with softboxes or reflectors. | A reflector gives a harder, brighter beam. A softbox spreads and softens the light but reduces output. |
| Bi-color COB | About 8,000–50,000 lux with a reflector; output depends on wattage and color-temperature setting. | Many models specify CRI and TLCI of 95 or higher; check ratings at more than one color temperature. | Commonly around 2,700–6,500 K. | Interviews, mixed indoor lighting, and shoots where matching warm and daylight sources matters. | Some fixtures produce less output at the warm or cool ends of their range. |
| RGBWW COB | About 5,000–40,000 lux with a reflector; saturated colors are often dimmer than white output. | White-light CRI/TLCI ratings are often 95 or higher; colored output should be assessed separately. | Often includes adjustable white light around 2,700–10,000 K plus RGB color mixing. | A versatile key light for white light, colored accents, and effects. | Compare white-light output and saturated-color output separately; RGB features do not guarantee high brightness in every color. |
| Bi-color soft panel | About 1,000–8,000 lux at 1 m, depending on panel size, diffusion, and power. | Many models specify CRI and TLCI of 95 or higher. | Commonly around 2,700–6,500 K. | Soft, broad illumination for faces, product shots, and small spaces. | The built-in diffusion is convenient, but the broad beam may be harder to control than a COB with a modifier. |
| RGB panel | About 1,000–6,000 lux at 1 m; colored output may be substantially lower than white output. | White-light CRI/TLCI ratings are often 95 or higher; color-gamut coverage varies by fixture. | Often offers adjustable white light plus a broad range of RGB colors; white-light CCT ranges vary by model. | Colored backgrounds, creative accents, and soft fill in compact setups. | Check whether the panel can provide the required brightness at the chosen color and white balance. |
| RGB LED tube | Often about 300–1,500 lux at 1 m; output depends on tube length, design, and measurement direction. | White-light CRI/TLCI ratings of 95 or higher are common on video-oriented models. | Many models provide adjustable white light and RGB colors; exact CCT range varies. | Practical lights, edge lighting, tight locations, and colored accents. | Tubes are easy to position but generally provide less concentrated output than COB fixtures. |
Brightness figures are broad, indicative ranges rather than directly comparable ratings. Illuminance depends on fixture power, beam angle, reflector or diffusion, color setting, and measurement method. For a fair comparison, check lux at the same distance and with the same modifier, and review independent test data when available. CRI and TLCI are useful indicators of color rendering, but they do not describe color gamut or guarantee identical color performance across fixtures.
How to Choose the Best LED Light Kit?
Check the modifiers before buying. A softbox softens facial shadows, while a grid limits spill onto nearby walls. An umbrella sets up quickly, but can send light across a small room. Check whether modifiers attach directly or need a separate adapter. Small details matter. A kit is only flexible if its mounts fit your stands and accessories. Look for a standard stand receiver, secure locking knobs, and a yoke that tilts without slipping. If you work in cramped spaces, test how far the light head extends beyond the stand.
Power ratings need context. The U.S. Department of Energy’s Energy Saver guidance says LEDs use up to 90% less energy than traditional incandescent bulbs; that is a bulb-level comparison, not a guarantee of kit runtime. Check the light’s actual input draw, then compare it with the battery’s watt-hour rating. Real runtime will usually be lower than a simple calculation suggests. For location work, consider battery availability, charging time, and whether the kit can also run from mains power. Weight matters, too. A sturdy case helps, but a heavy stand can turn a short walk into a chore. Spec sheets still leave questions: ask for measured output at a stated distance, and verify that the light stays stable at full brightness.
How to Choose the Best LED Light Kit?
Match the Kit to Your Camera, Space, and Workflow
Start with your camera and the way you shoot. For interviews, a soft key light can make faces look natural without harsh shadows. For tabletop videos, a smaller panel may fit beside the camera and illuminate a product evenly. Check that the kit’s mount works with your camera support, and confirm that its power options suit your location. A compact light is easier to move, but it may not brighten a large room enough.
Tips: Measure your filming area. Check the light’s brightness controls, color temperature range, and diffusion options. Test placement before buying if possible.
Think about your workflow, too. If you often film alone, choose controls you can reach quickly and settings that are easy to repeat. A display showing brightness and color temperature can save time between takes. In a tight room, adjustable stands and a small footprint matter more than maximum output. There is no perfect kit for every setup. You may trade portability for power, or simplicity for more control. That compromise is worth considering before you spend.
Match the kit to your camera, available space, and workflow. These planning ratings (1 = lower fit, 5 = higher fit) compare common kit formats—not manufacturer specifications.
Quick guide: Choose a compact on-camera light for run-and-gun work, a single panel for tight spaces, a two-light kit for flexible setups, or a COB light with a softbox when you have room to shape a softer key light.
A low price can be tempting, but compare the full kit rather than the headline cost. Check how many fixtures, cables, mounts, and power supplies are included. A missing adapter can turn a bargain into an extra purchase. Set a budget that leaves room for replacement parts. Not glamorous, but useful.
Build quality shows up in small details. Inspect the cable strain relief, connector fit, and how firmly each light locks onto its stand. If possible, handle the kit before buying; a wobbly mount is easy to overlook in product photos. For frequent setup and teardown, sturdier hinges and a protective case may matter more than a few extra brightness settings. Plastic is not automatically poor quality, though. Weight alone is a rough guide.
Read the warranty terms closely. Find out what it covers, how long coverage lasts, and whether accessories are included. Keep the receipt and test every light soon after delivery. Expandability matters if your setup may grow: check whether extra fixtures can connect safely, whether controls work together, and whether stands support the added weight. Compatibility can be less obvious than it sounds. I would not assume that matching plugs mean matching performance; verify the specifications before adding components.
